Strapi is an Open Source headless CMS based on NodeJS. It provides the backend admin tools to quickly create an API - both REST and GraphQL. I picked this up for a quick project in place of my regular Python frameworks like Flask or Django, because I can have an API up and running without writing a single line of code.
This is a mini series which outlines:
- Setting up Strapi and creating an API - (you are here)
- Adding ownership control to the API endpoints
- Optimising REST API responses
Why this series?
There is already wealth of blog posts on using Strapi for creating a variety of websites and apps. But most of them tend to focus on capabilities of vanilla Strapi. I want to focus on a couple of customisations that I made when using it to build a web application.
Our example app
Our example API is for an expense management system. Users can do the following things via the API:
- CRUD operations on Expense items
- CRUD operations on Categories which will be used to group the expense items
Note: I am not going to get into building frontend in this series, we will just focus on Strapi and the API
Installing Strapi
The Strapi Documentation is probably the best source for this based on your method of choice. You can install it on local machine, just pull a docker container or use a cloud provider like Digital Ocean or Platform.sh.
I will refrain from posting the instructions here to avoid duplication.
Creating the Admin Account
Once you have created a new project, start the application in development mode.
yarn develop
Side note: This is very important, I once started it using the yarn start command and spent a solid 5 minutes searching why all the edit functionalities have disappeared.
You will be greeted with a admin registration screen like this one.
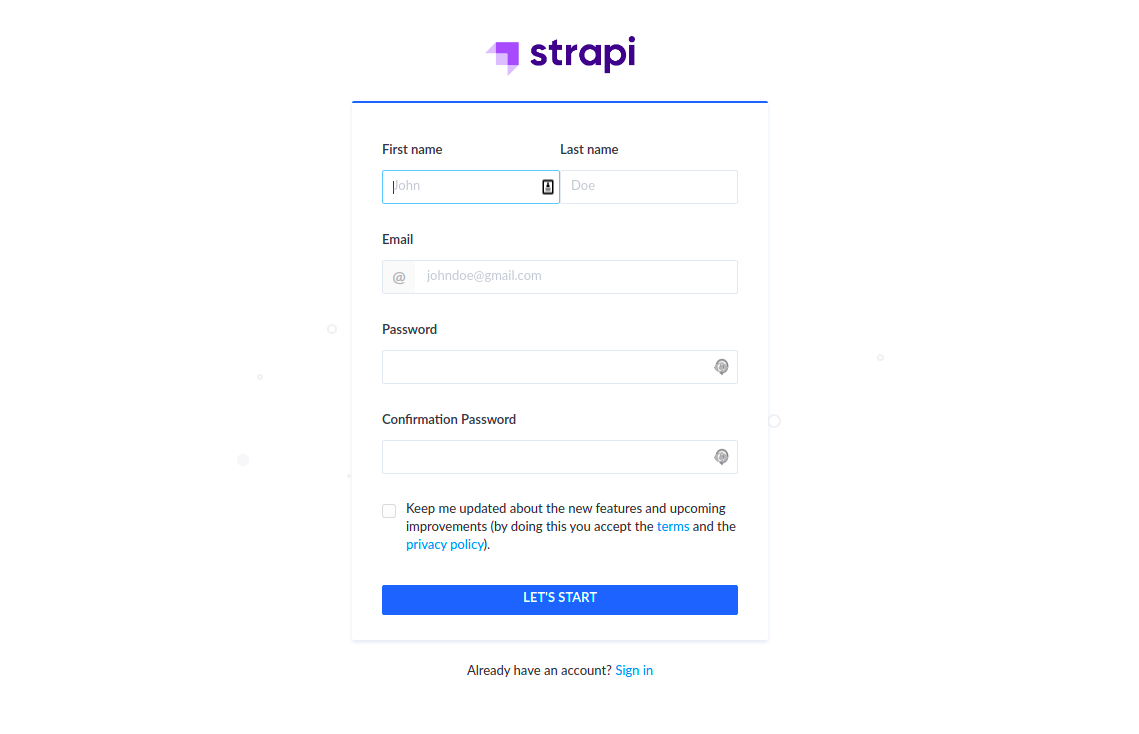
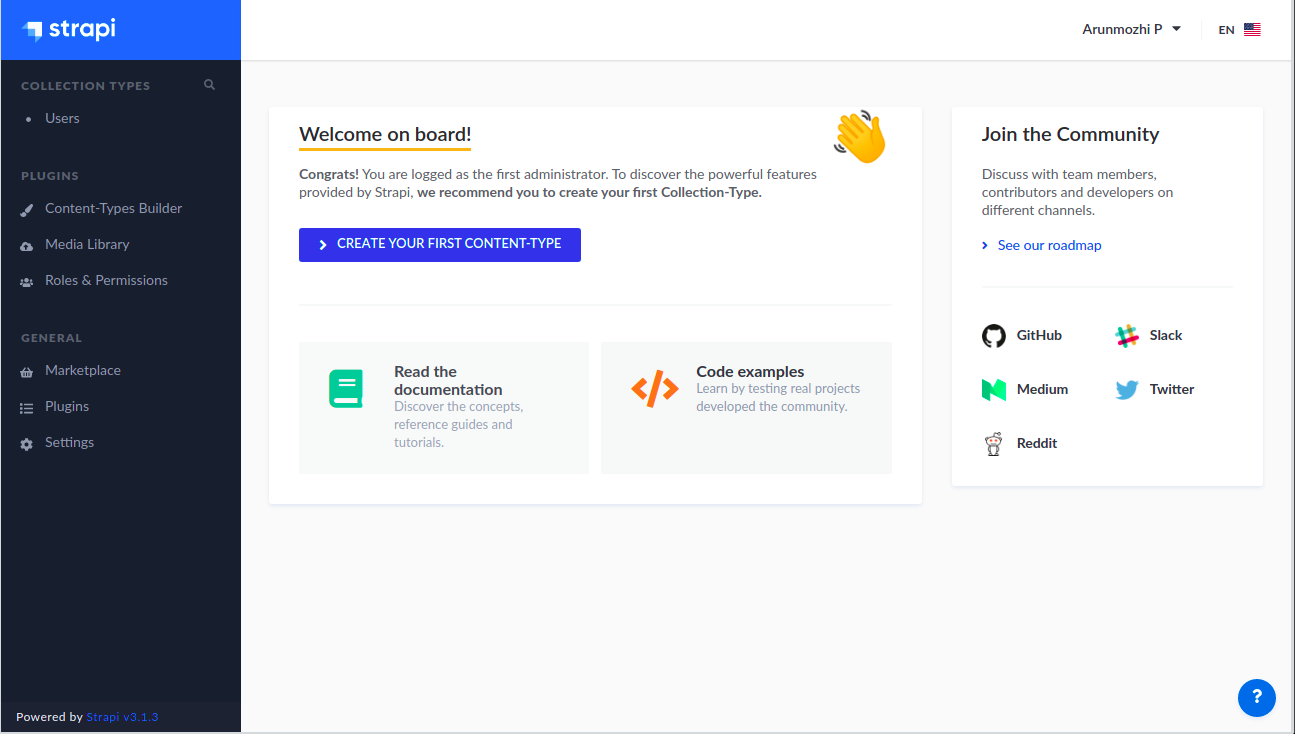
Fill in the information and create the admin account. This should log you in and show the Admin Homepage
Creating the Models
Strapi employs the well known MVC (Model-View-Controller) pattern. So, the first step is to define the Models for the API. Models are called as “Content-Type” in Strapi due to the CMS nature of the application. Click the “Create Your First Content-Type” button on the home page to create our first model - Category.
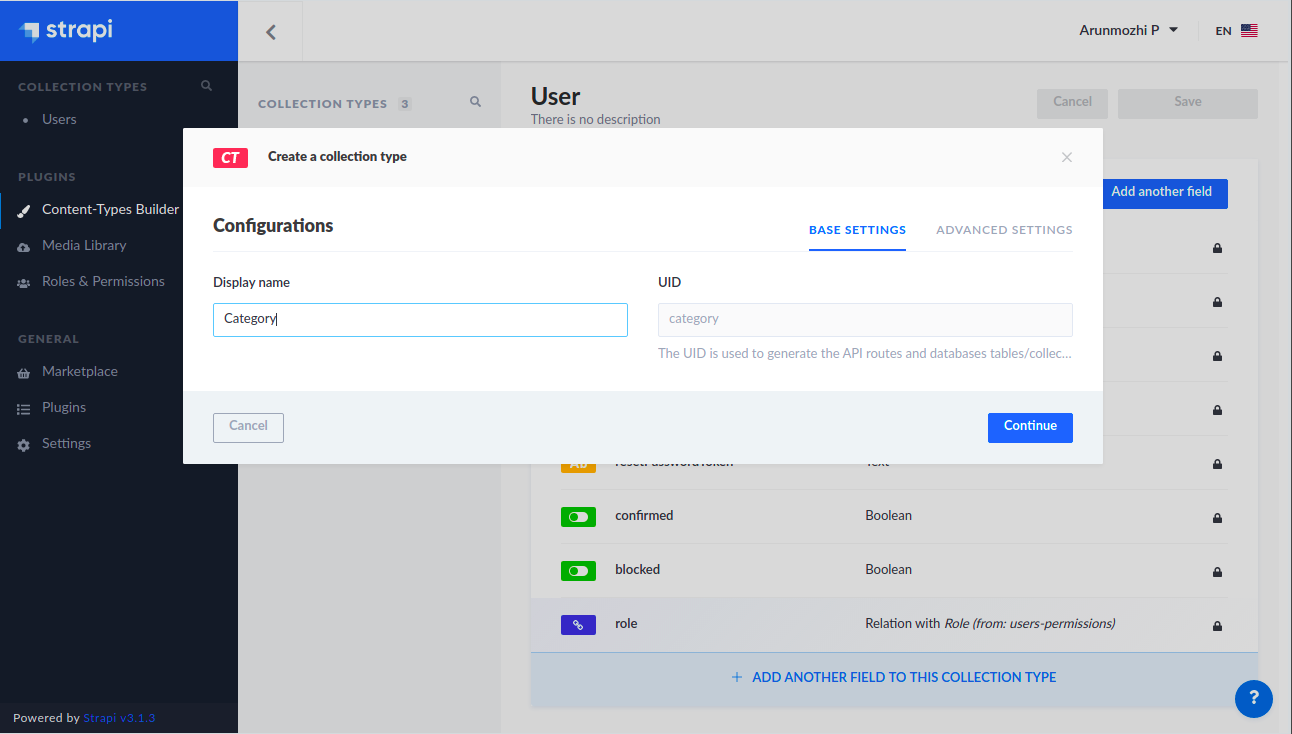
Click Continue, now we can add the fields for the model.
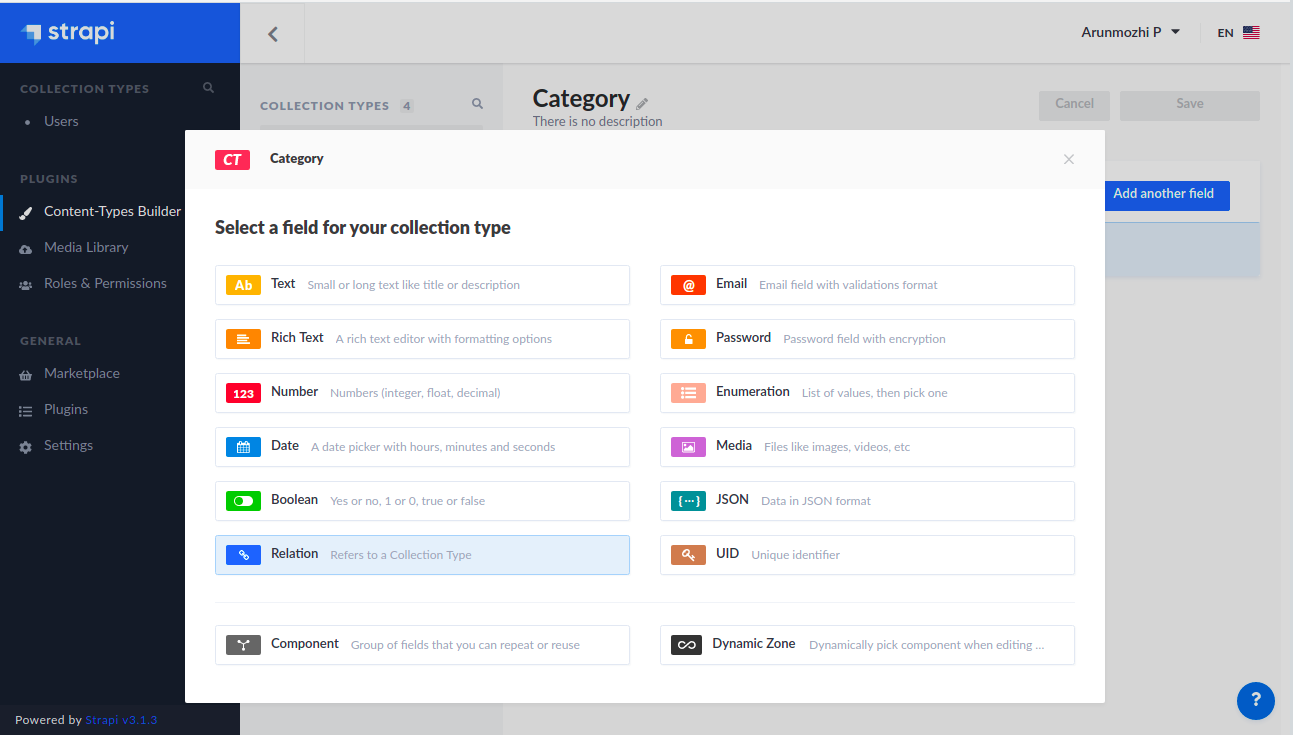
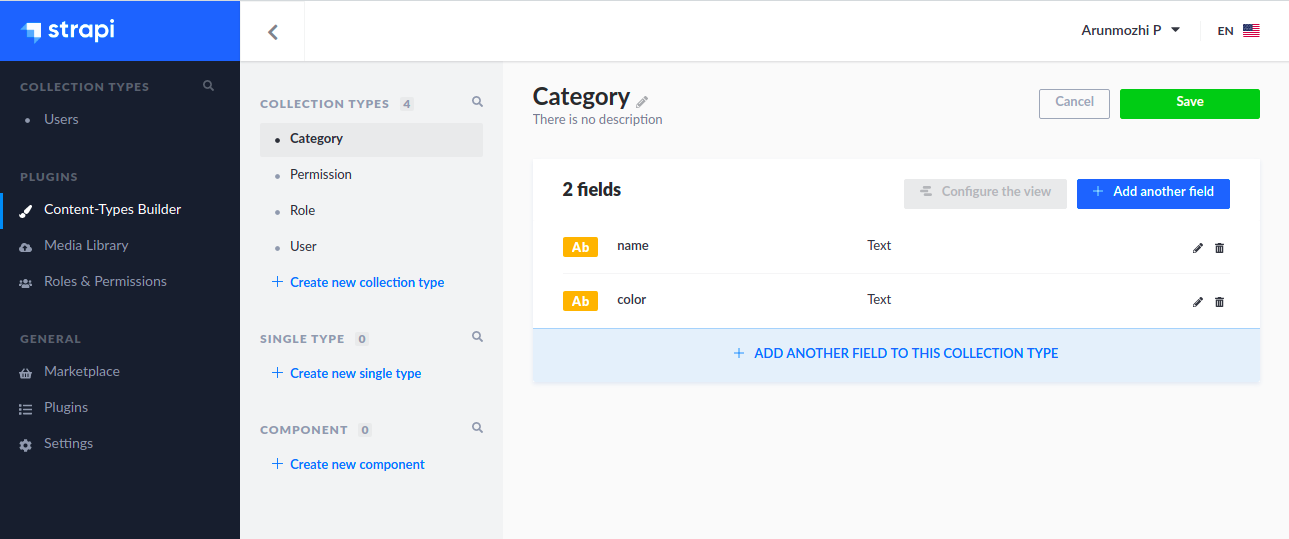
The category model is going to have two fields:
- name - a string - the name of the category
- color - a string - the hex code of the category color which be used for the frontend
Since both of them are strings, let’s click Text and create the fields
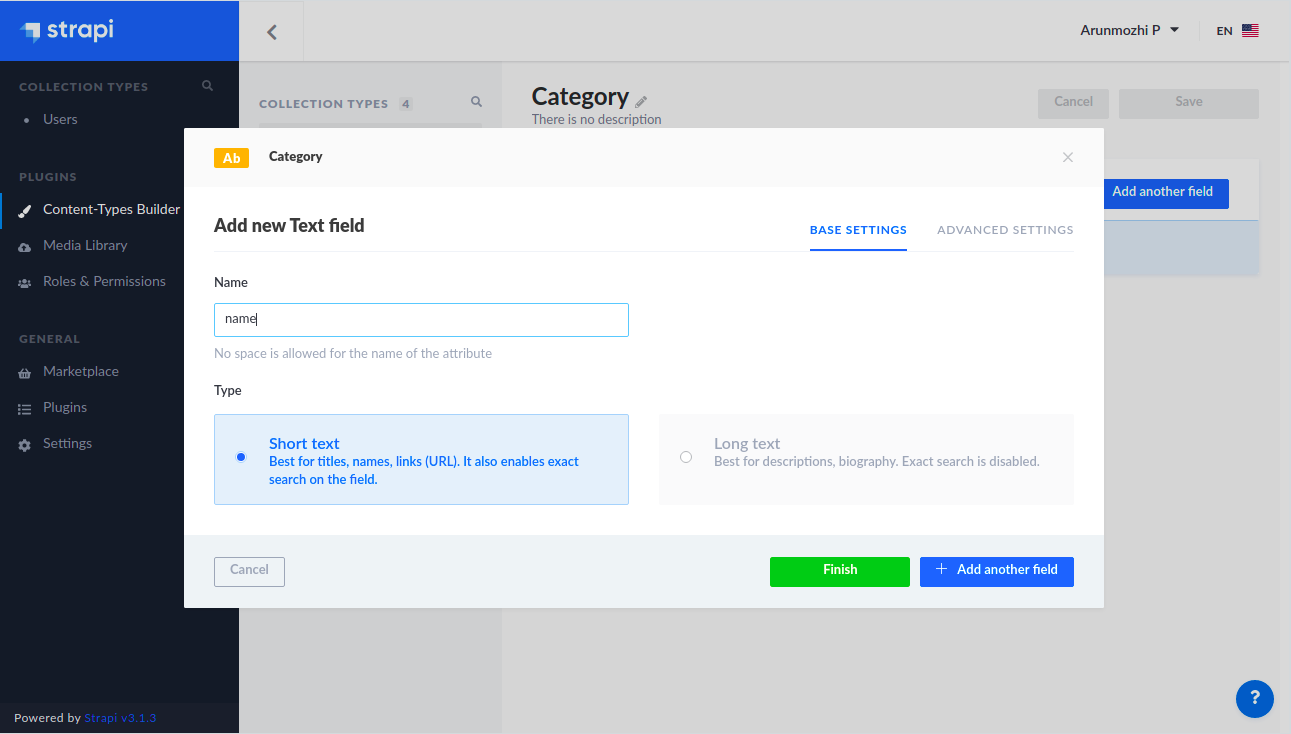
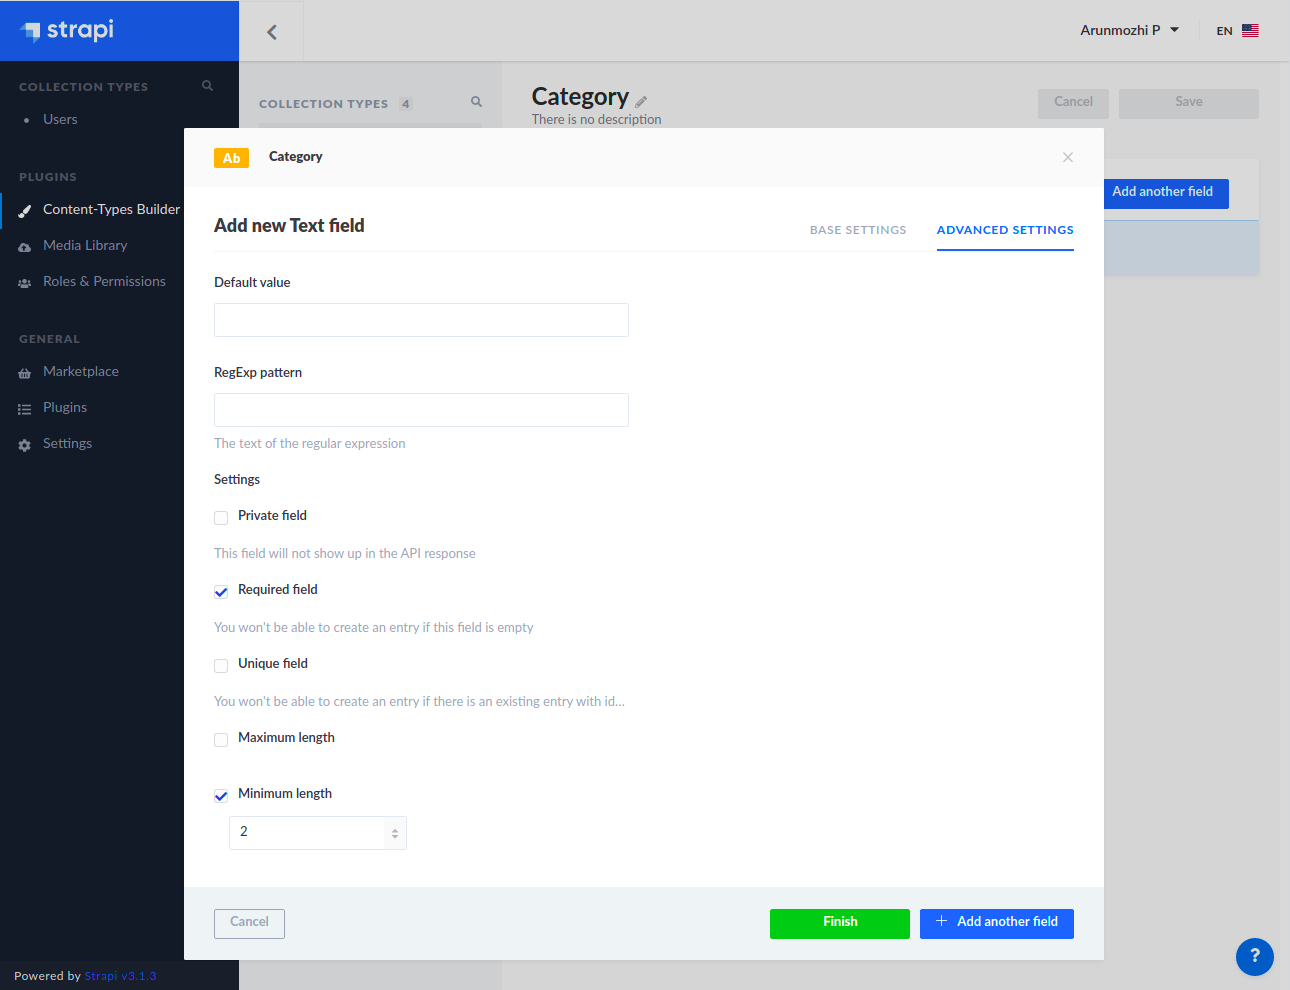
When we describe models in code, we usually have some constraints like primary key, unique, not-null ..etc., In this case we want the categories to have a name and have a minimum of 2 characters. We can specify that by switching to the Advanced Settings tab and setting the constraints.
Click + Add another field and create another “Text” field for color. (I am leaving the screenshot out for that one)
Click finish after putting in the details for color field.
We want the Categories to be user specific. So we need to add a relationship between the User Model which is already there and between the Category model which we just created.
- Click “Add another field” button again and select Relation.
- On the relation dialog on the right side, click the dropdown next to Category and select User.
- In the middle relationship buttons select the Many-to-One icon such that the description reads (User has many Categories)
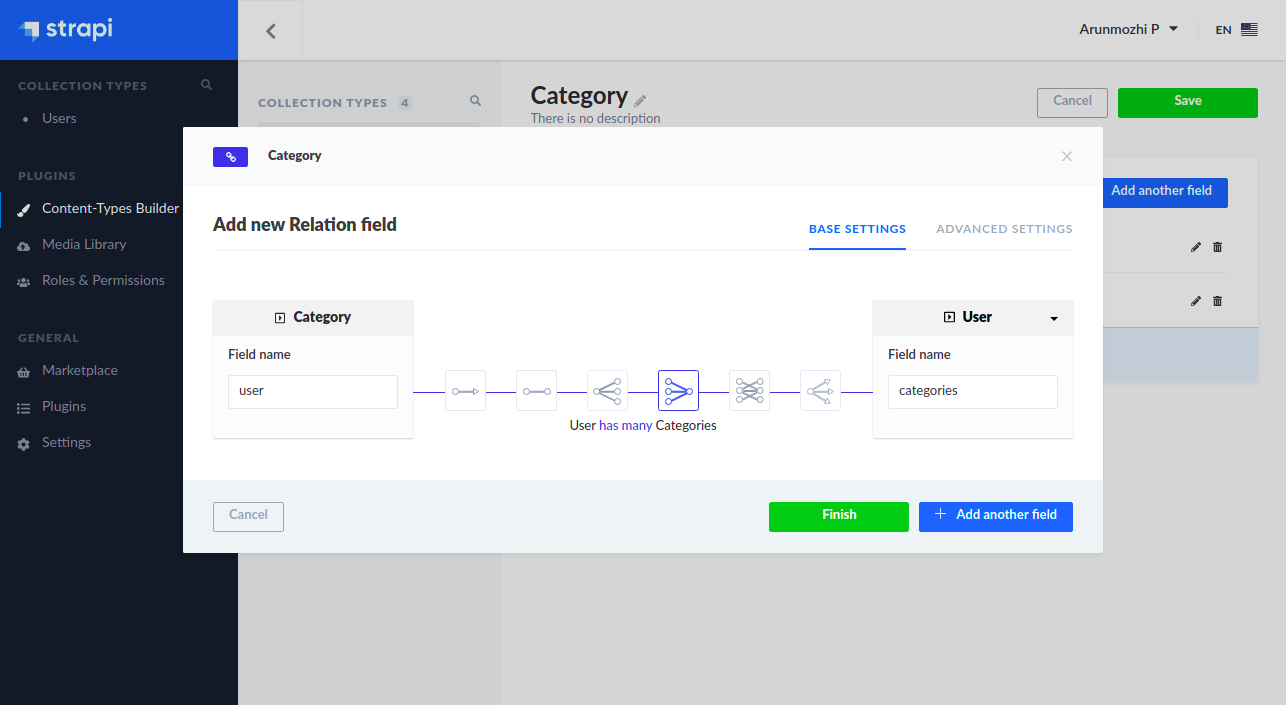
- Click Finish and Click Save
- Strapi will save this changes to the application and restart the application.
- Now if you open the
apifolder and look at the contents you will see the files that Strapi created for the ‘Category’ Model
api
└── category
├── config
│   └── routes.json
├── controllers
│   └── category.js
├── models
│   ├── category.js
│   └── category.settings.json
└── services
└── category.js
Exercise: Create the Expense Item model
Now that we know the steps to create a model visually, I am going to leave creating the Expense Item Model as an exercise. The model will have the following fields
- amount - Number - Floating point value to hold the expense amount
- name - Text - A short description of the expense
- date - Date - The date when the expense was made
- category - Relation - category of the expense (Category has many Expense Items)
- user - Relation - User the expense item belongs (User has many Expense Items)
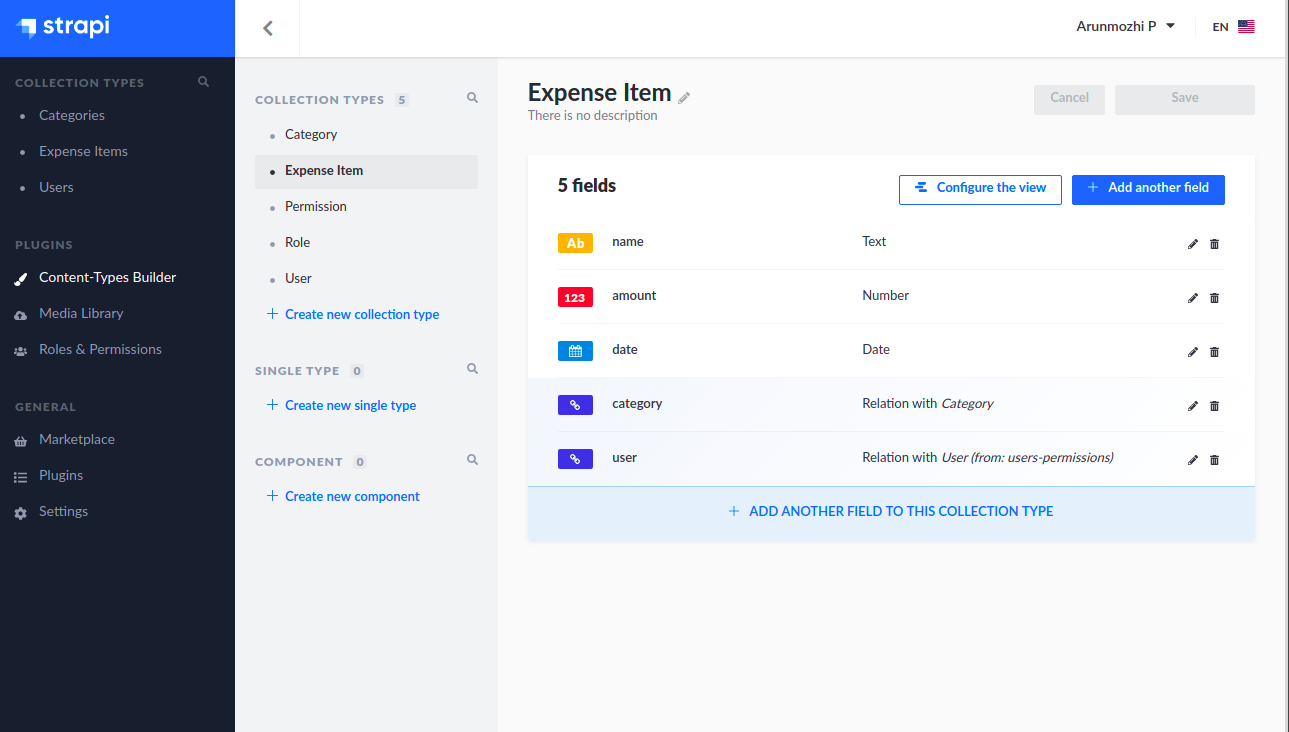
Testing the REST API
Now that our models and controllers are all in place, our API is ready. Let us try it out by visiting http://localhost:1337/categories

Oops, we don’t have access. While it is a disappointment, it is actually a good thing. By default Strapi doesn’t allow access to any resources. We need to configure access rules for the API to be usable. Let us do that by heading back to Strapi admin page.
Enable API Access
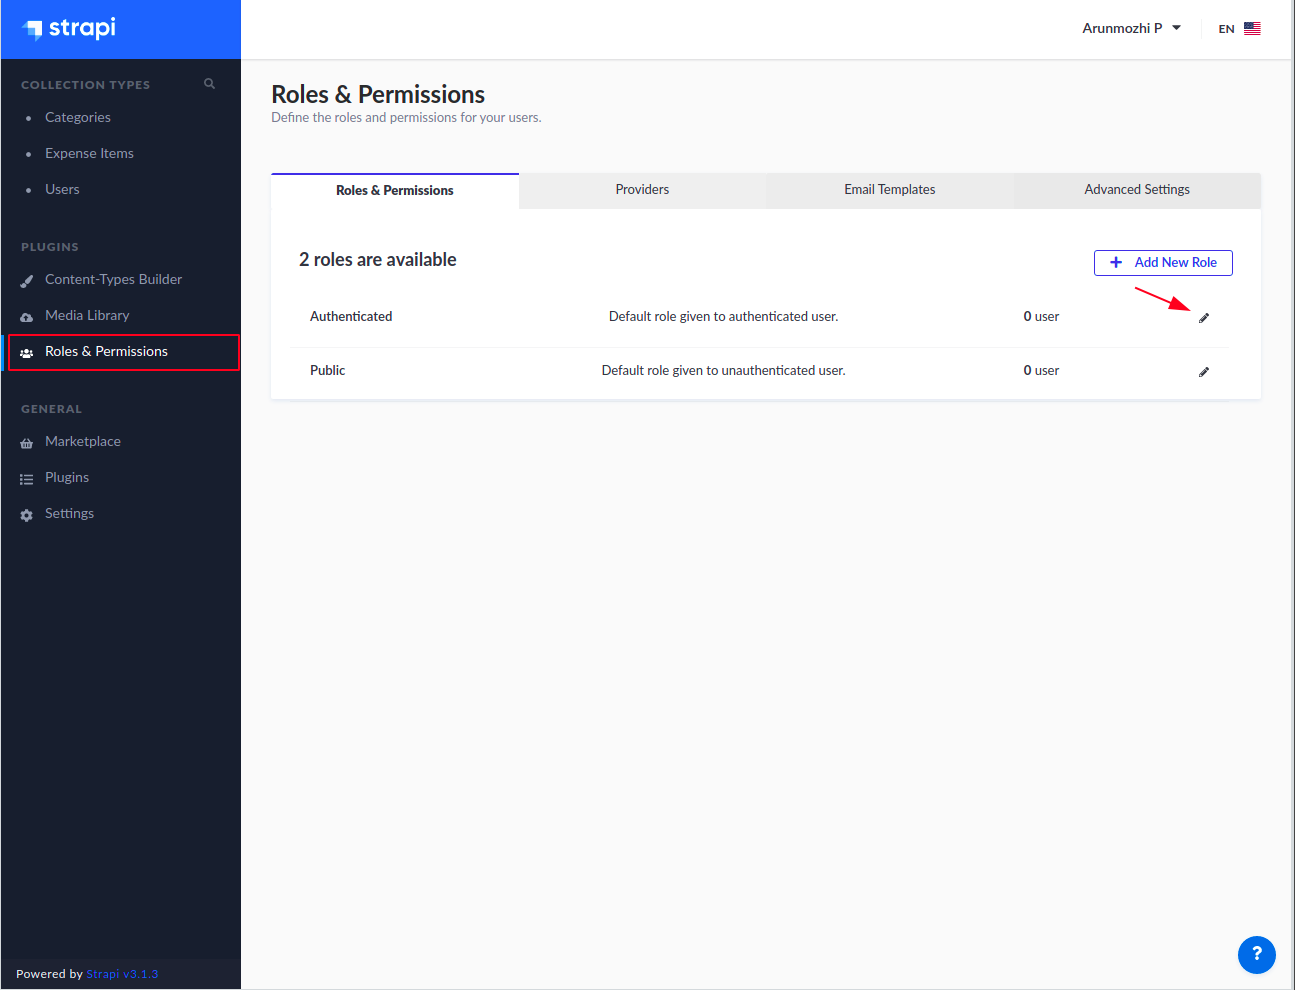
Go to the Strapi Admin page, click the Roles and Permissions on the sidebar and click on the edit button for Authenticate.
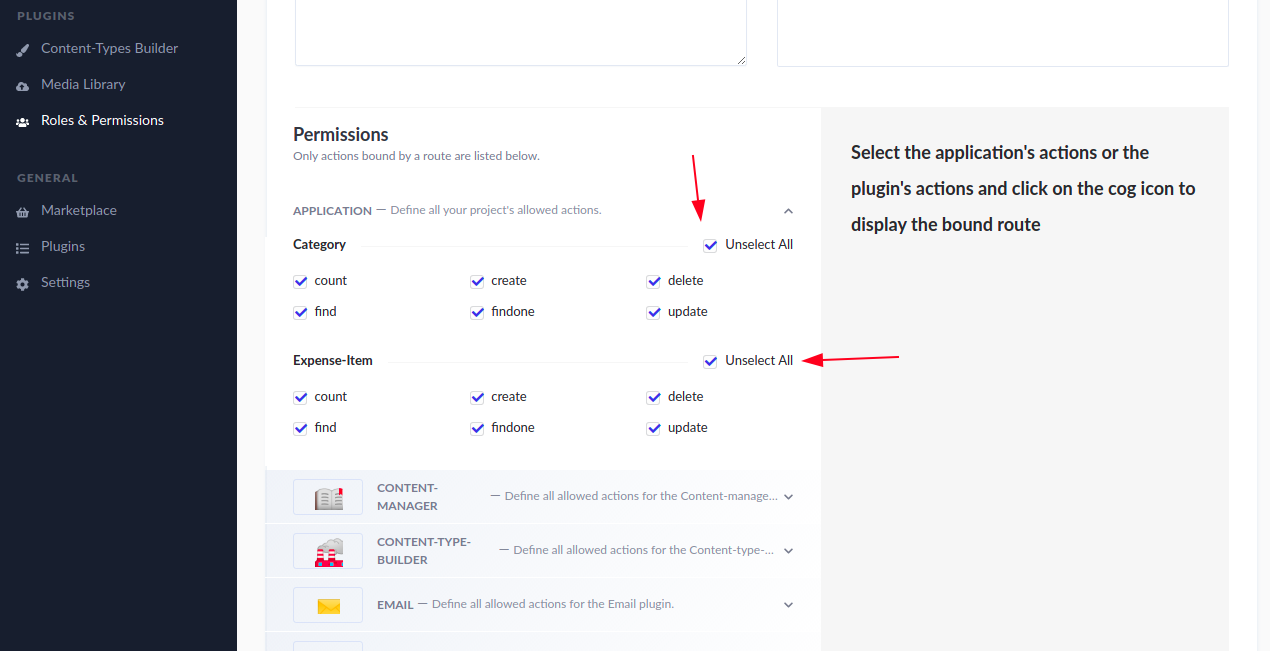
In the Permissions, click Select All for Category and Expense-Item and Save. This will allow any user who is logged into to perform all sorts of operations on the Category and Expense Item models.
Create a test user
It can be noticed that the Roles & Permissions page shows “0 User” for the Authenticated role despite us logged in as the admin. That’s because Strapi considers Super Admin users different from users created for the User content type. So, we will create a new user who will act as the test user.
- On the sidebar click Users under Collection Types
- Click “Add new user”
- Input username, email and password
- Set confirmed to ON (we are going to skip the whole email confirmation here)
- Click Save
Now if you switch to the Roles & Permissions page, you should see it say “1 User” in the Authenticated row.
Testing the API as an authenticated user
Side Note: I will use Postman to test the API. You can use whatever you are comfortable with using this as reference: Authenticated Request
In order for the requests to be sent as an authenticated user, we need a use the JWT returned during login and use it as the Bearer Token. So, let us login at http://localhost:1337/auth/local
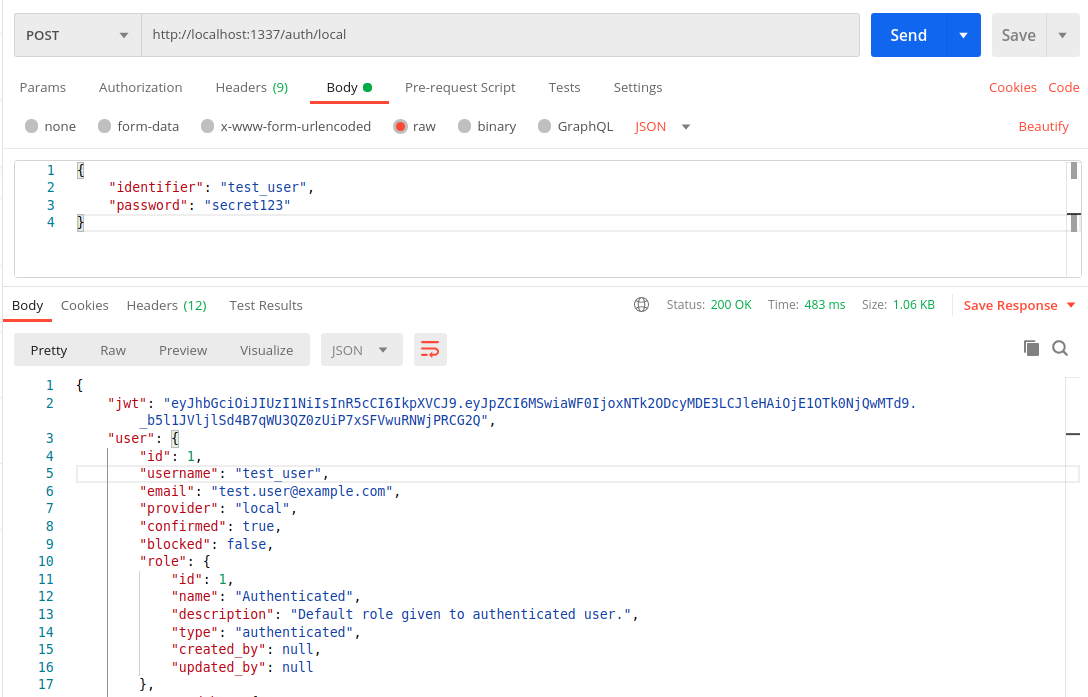
Let us copy that JWT token from the response and use it to test http://localhost:1337/categories
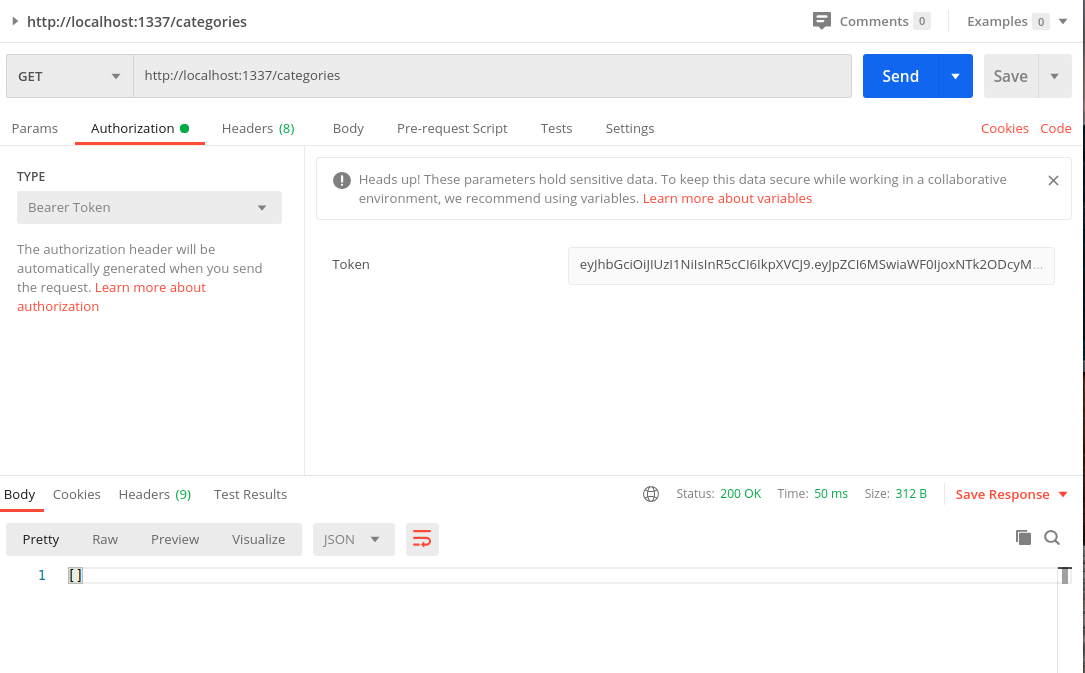
The 403 Forbidden error is gone and we have a 200 OK response with empty array []. Now let us create a Category using a POST request with the same request.
- Set the method to POST
- Switch to the Body Tab
- Select
rawand typeJSONand - Enter the data as
{
"name": "Travel",
"color": ""
}
Side Note: I like how Postman provides functions to generate values like random colors.
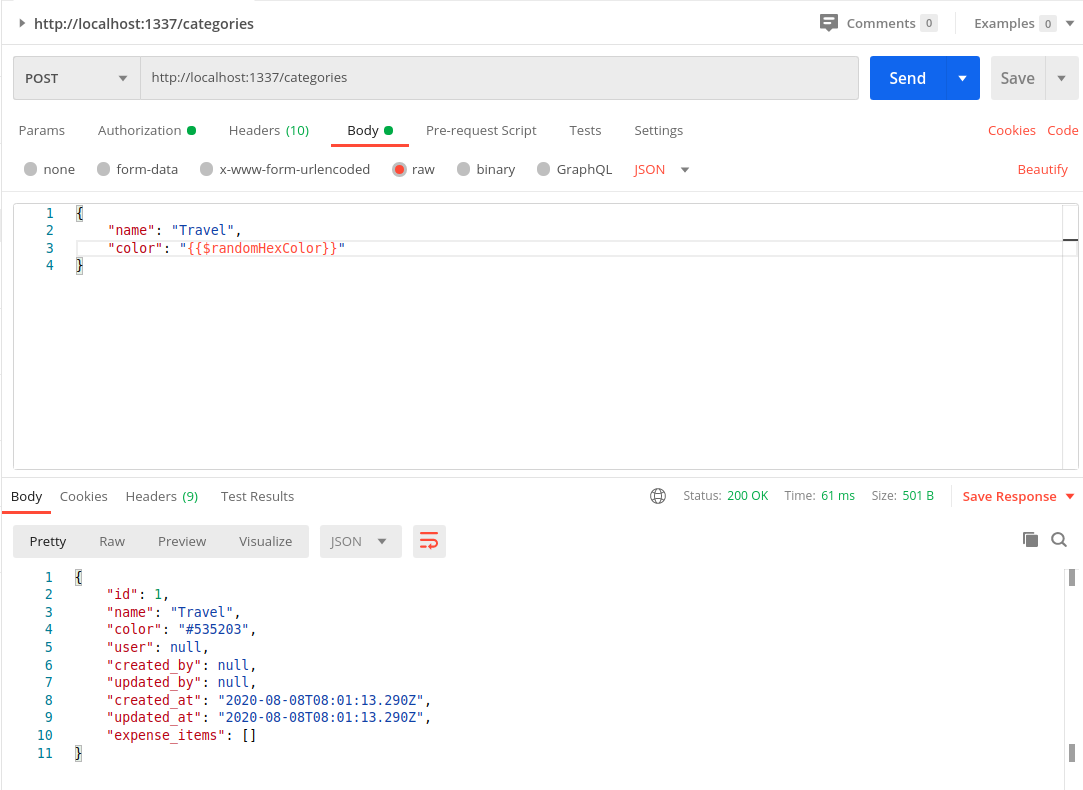 Response
{
"id": 1,
"name": "Travel",
"color": "#535203",
"user": null,
"created_by": null,
"updated_by": null,
"created_at": "2020-08-08T08:01:13.290Z",
"updated_at": "2020-08-08T08:01:13.290Z",
"expense_items": []
}
A new category has been created with the with the ID 1. But notice that the user attribute is actually null. That is because we didn’t pass the “user” attribute in the POST request. We shouldn’t have to. That information is already available with Strapi in the form of JWT token we have sent with the request.
How do we make Strapi automatically populate the user field?
Before we answer that, let us test another thing related to this user issue.
Testing Access Control of Users
- Create another user in the Strapi Admin window, let us call the user
intruder - Now log in as the
intruderuser and get the JWT Token - Using
intruder’s JWT token let us send a get request to the/categories
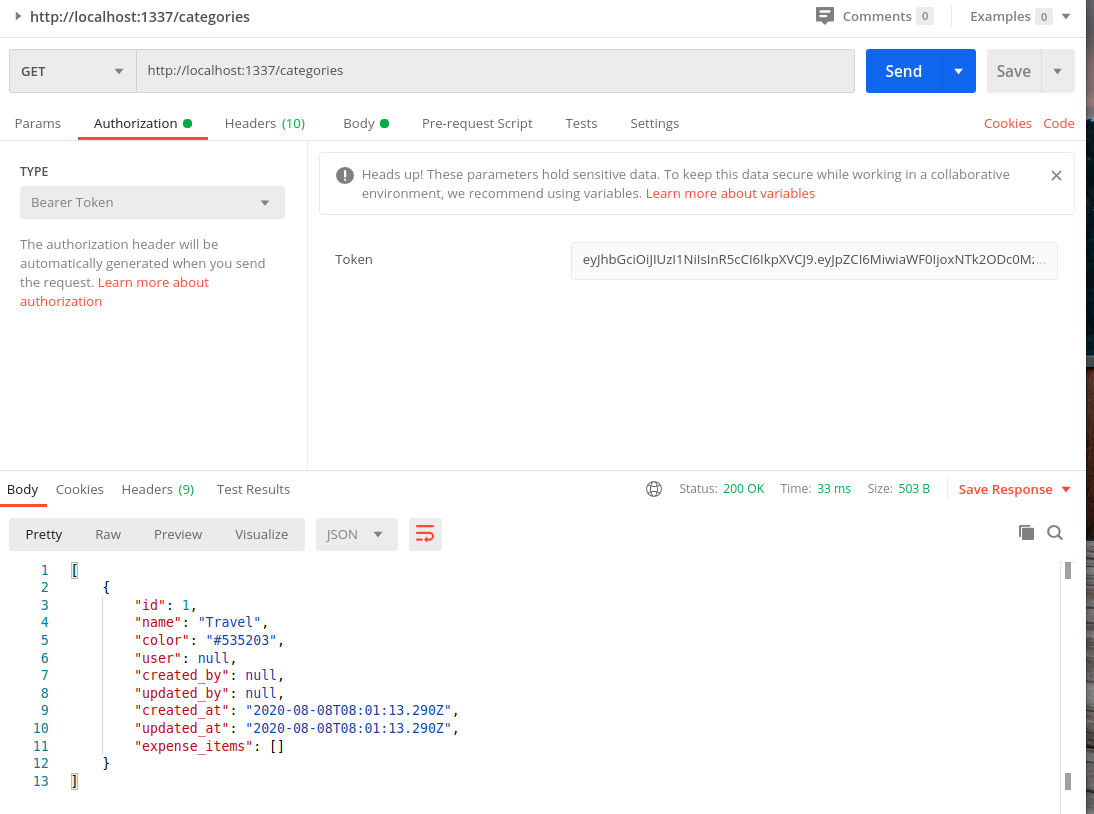
The intruder is able to access the category created by test_user. This will happen even if the user value is not null. For example, go to the Strapi Admin and set the user value of the “Travel” category to test_user
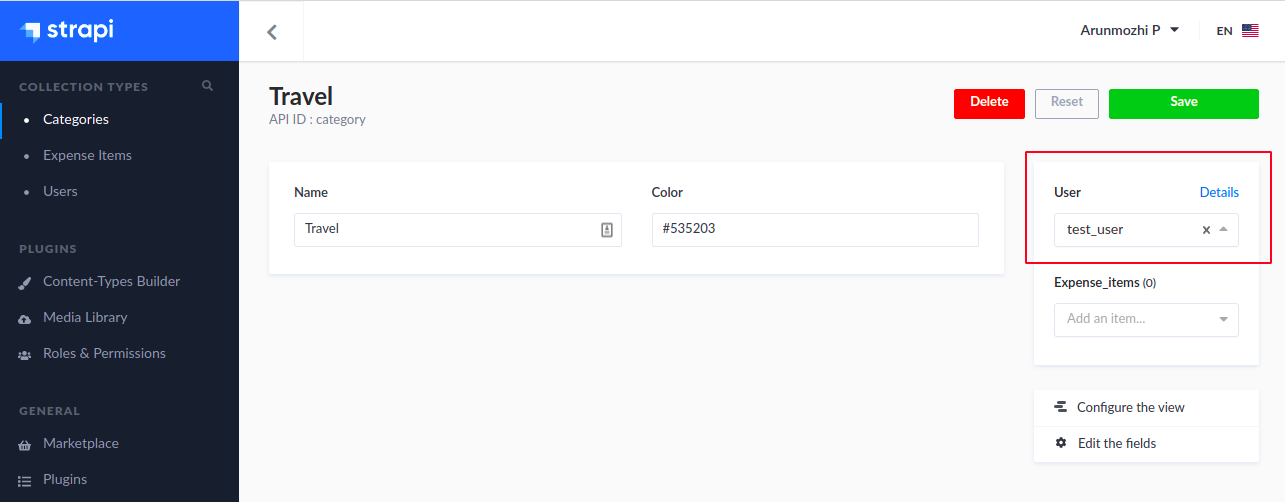
Now switch back to Postman, don’t change anything and rerun the GET /categories request again.
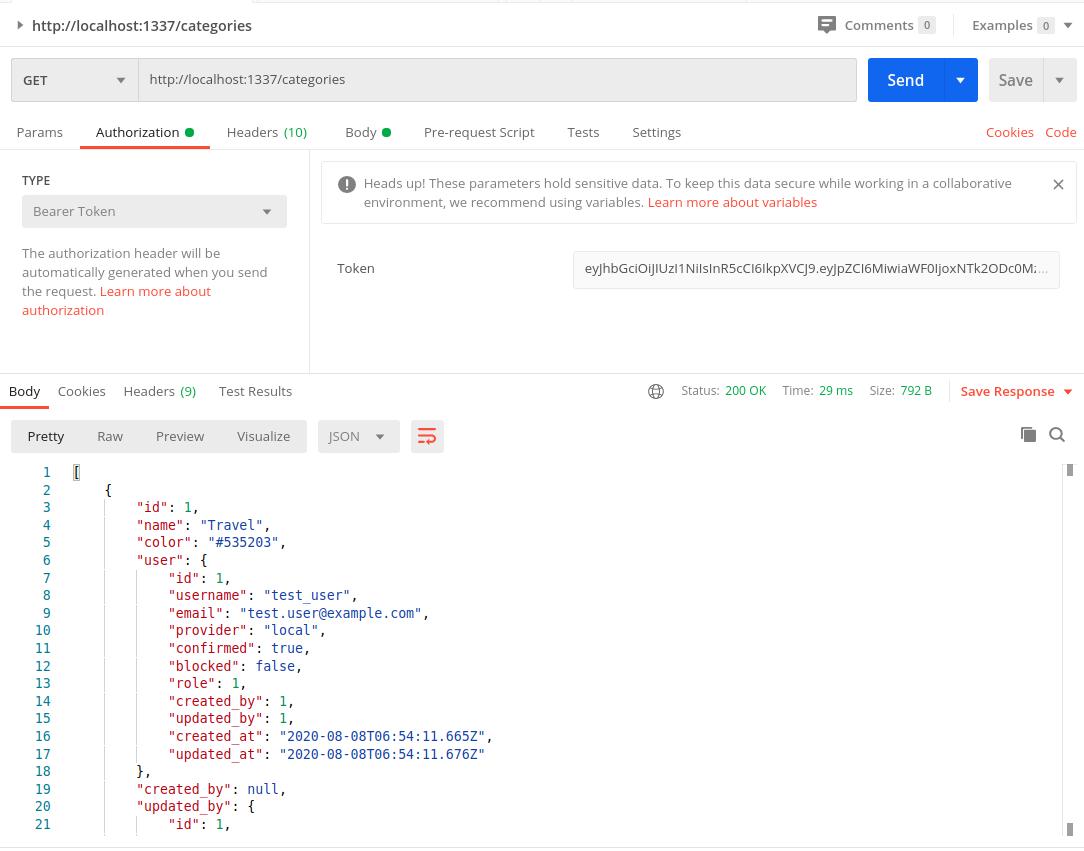
You will notice that we are still able to access test_user’s information as intruder.
To summarise:
- We created the category as test_user
- We have set the category to belong to test_user
- We made request using intruder’s token
- And we are able to access test_user’s data
So, any authenticated user can read anyone’s data. Not just read, if you recall the settings from “Roles & Permission”, they can also change and delete anyone’s data. Effective making the entire API useless.
Restricting access to Owners
Now we have identified two issues:
- Automatically assigning ownership of a category to the user creating the category (discussed before)
- Restricting access to data owners only
Both of these can be solved by modifying the Controller logic of the models. We will deal with that in the next part.
So far…
The impressive thing about using Strapi for an API is the amount of stuff that comes out of the box.
- Setup the project structure with necessary libraries
- An nice Admin backend
- Create Models with relationships, constraints and validations
- Token based authentication for API access
All of this without writing a single line of code. If we have used a regular library, we would be swimming in configurations and routes by now.