
Yesterday, I was working on the ward level parks map of Chennai I had to join a CSV data layer with the boundary polygon layer, but there was one issue while my CSV file has the ward numbers as integers (1,2,3..etc), the polygon layer had them as strings (Ward 1, Ward 2, Ward 3 …etc.,) So I was thinking, wouldn’t it be nice just to strip the word Ward and put it in a new column, so that I can make a join by matching the ward numbers. Turns out Python integration in QGIS is so good that, I did it without even searching the internet. Here is how.
- Open the Attribute table
- Open Field Calculator.
- Enter the “Output field name”
- Switch to “Function Editor”
- Click the [+] button to create a new function file.
- Changed the function name, parameter and return the value after stripping “Ward ” from the string. Read the docs given below the function editor to understand what’s going on the file.
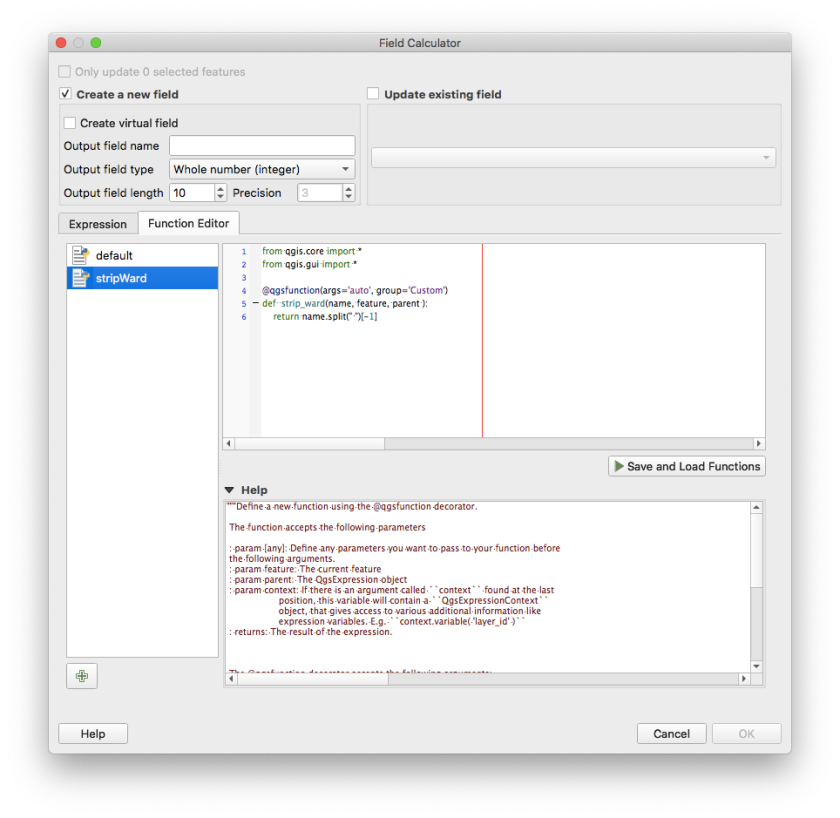
from qgis.core import *
from qgis.gui import *

@qgsfunction(args='auto', group='Custom')
def strip_ward(name, feature, parent ):
    return name.split(" ")[-1]
Now switch back to the Expression tab and call the function to calculate the new field

Click OK. Now the new field with the computed value would be created.
I had a simple use case, by one can use the power of Python to calculate anything from existing data and generate a new field based on it. I was really blown away by the level of Python integration in QGIS.

Hello, Can I also use this code to create multiple columns? with the properties, of text, and text length 50?
For example, I want to add column “name” (text 20), and column “address” (text 30) using (Python) code .
LikeLike
Hi, it has been a while since I last used Qgis. From what I remember, you can only add one column at a time. But you can rerun this step multiple times to add multiple columns without any issues.
LikeLike
Hi, I have a Py script, what can do it now.
LikeLike